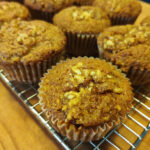
Banana Walnut Bran Muffins

Banana Walnut Bran Muffins

These muffins are quick and easy to make, pretty darn healthy, but mostly delicious

Servings 11 muffins

Ingredients

dry ingredients

  • 160 g all purpose flour
  • 50 g bran
  • 50 g walnuts chopped
  • 1 tsp cinnamon
  • 1/2 tsp salt
  • 1 tsp baking powder
  • 1/4 tsp baking soda
  • 1/4 tsp nutmeg

wet ingredients

  • 2 bananas extra ripe (see note)
  • 2/3 cup brown sugar
  • 1/2 cup oil
  • 1/2 cup sour cream
  • 2 eggs
  • 1/2 tsp vanilla

topping

  • 60 g walnuts chopped but chunky
  • 2 tbsp brown sugar
  • 1 tbsp butter melted

Instructions

  1. Preheat oven to 350 °F

  2. Prep muffin tin(s). I use silicone cupcake cups. If I use paper cupcake cups, I usually spray with vegetable spray (pam) so that the paper comes off easily. You could also spray the muffin tins directly, but I like using the cups

  3. Combine all dry ingredients in large bowl and whisk together

  4. Combine all wet ingredients in smaller bowl and whisk to combine

  5. Add wet ingredients to dry ingredients bowl. Stir to combine, but don't over work it

  6. Combine topping ingredients. I usually melt the butter in the microwave in a measuring cup, then add the brown sugar and walnuts to that cup

  7. Portion equal amounts in the muffin cups. If I do 2 bananas I make 11 muffins, if 3 bananas, it's 12. You can make 12 with 2 bananas, but they'll be smaller

  8. Sprinkle the topping, distributed evenly over the muffins

  9. Bake for 25 minutes at 350 °F

Recipe Notes

I make these when I have bananas that are too ripe to eat…think heavy brown spotting. You can even peel the overripe bananas and put them in the freezer to make muffins later. The defrosted bananas work fine in this recipe.

Note that you can up the banana count to 3. This will give you an extra muffin and they will all be more moist. Your call

Bar Style Snack Mix


Sweet Salty Spicy Crunchy Yummy Bar Snack Mix

Ingredients

  • 6 Cups Chex cereal whichever Chex type cereal or generic you like. We oat or corn usually
  • 4 Cups mini pretzel twists you can also use pretzel sticks if you like things that stick into the roof of your mouth
  • 3 Cups cheezy crackers cheezits, goldfish...
  • 1 Cup cashews
  • 1 Cup peanuts
  • 1 1/2 tsps garlic powder
  • 1 tsp salt
  • 1 tsp paprika
  • 2 Tbls Worcestershire sauce
  • 2 Tbls hot sauce
  • 1/2 tsp black pepper
  • 1/2 Cup butter
  • 1/4 Cup brown sugar

Instructions

  1. Preheat oven to 300 degrees

  2. In roasting pan combine cereal, crackers and nuts (crunchy stuff) and loosely mix

  3. Combine all other ingredients in pan and mix together over low heat until butter is melted and everything combines. Alternatively, put ingredients in microwave safe bowl and warm slowly until all melted. Do not do this on high. You'll have  buttery mess on the inside of your microwave if you do.

  4. Pour the butter mixture over the mixture in the roasting pan, mixing it to get it evenly distributed over all the crunchy stuff.

  5. Bake in the oven for 1 hour, stirring lightly ever 15 minutes.  Allow to cool at least a bit or you'll burn your tongue. Dig in

When you’re drinking adult beverages at the bar, they provide you some good snacks that take care of your munchies and give you enough salty wonderfulness to keep you drinking for a while.

What a shame not to have that at home. Worse, what a shame to rely on pre-made bagged snack and chex mixes which are nearly universally lame.

So here is our take on this. You can add or subtract, up it or down it in size, but we like this just fine

Keto Cheesecake in Cupcakes

Since going low carb, I’ve had no sugar or flour for months. and months. and months.

But I still love dessert and I still love to bake so I pulled together a recipe from a bunch of different recipes to make something quick to pull together, but still low carb. Even if you serve this with a topping of a few berries you will still stay on the wagon, but feel like you haven’t had to give up dessert completely.

Keto Cheesecake Cupcakes

Low carb, great taste and easy to make. This is a dessert you'll love

Servings 10 cupcakes

Ingredients

Cheesecake mix

  • 2 packages cream cheese softened
  • 1/2 C sweetner (or equivalent)
  • 1/4 C sour cream
  • 1 tbsp lime or lemon juice
  • 1 tsp vanilla

Crust mix

  • 2/3 cup almond flour
  • 1/3 cup coconut
  • 1 tsp cinnamon
  • 2 tbsp butter melted

Instructions

Crust mix and setup

  1. Preheat oven to 350

    Line 10 cupcake tin with silicone cupcake liners. You can use paper if that's what you've got, but I've fallen in love with my silicone liners

    Mix all the crust ingredients together in a bowl. Distribute evenly amongst the 10 cupcakes.

    Using a juice glass or other small flat bottomed item, press the crust mix into the bottom of each cupcake.

Cheesecake mix

  1. Put all ingredients for the mix into a blender.

    Starting out low, mix everything until is is smooth.

    Distribute the mixture amongst the 10 cupcakes on top of the crust mix

    Bake for 20-25 minutes at 350.

    Let cool completely

Killer Lettuce Wraps

You know those great lettuce wraps they have at P. F. Chang’s? The ones that are a bit on the pricey side, but REALLY good? Well, these are close.

I personally like mine a bit better because of the fact you can do it with either beef or chicken and because it takes less time to make than to drive to P. F. Chang’s (I do have one in the neighborhood, but in Texas neighborhoods are more like a small region elsewhere) and, of course, they cost a bunch less.

Killer Lettuce Wraps

An asian fusion kind of lettuce wrap that is good for a meal or an appetizer

Ingredients

  • 1 tablespoon olive oil
  • 1 pound chopped chicken or beef
  • 2 cloves garlic minced
  • 1 cup onion diced
  • 1 tablespoon freshly grated ginger or ginger paste
  • 1/4 cup hoisin sauce
  • 2 tablespoons soy sauce
  • 1 tablespoon rice wine vinegar
  • 1 tablespoon Sriracha optional
  • 1/2 small can whole water chestnuts drained and diced
  • 2 green onions thinly sliced
  • Kosher salt and freshly ground black pepper to taste
  • 1 head butter or iceberg lettuce separate into leaves

Instructions

  1. Prep the lettuce by getting separate leaves for wrapping. I'll get you instructions in the future. Right now you're on your own. Sorry.

  2. Chop a pound of chicken or beef.  Or use ground. See note.

  3. Heat the oil in a skillet on medium. Add the meat. Stir until lightly cooked (white for chicken, brown for beef)

  4. Add the garlic, onions and ginger paste. Cook, stirring occasionally until the onions are mostly clear.

  5. Add the hoisin, soy sauce, rice wine vinegar and sriracha. Simmer and stir until the extra water in the sauce is evaporated. It should just look like little pieces of meat and onion held together by something yummy

  6. Check the taste. Salt and pepper if needed, although I don't usually need it.

  7. Add the green onions and water chestnuts and stir through. Put in a serving bowl and sprinkle with a little finish of sesame oil. Mmmmm. Smells good.

  8. Put out the meat and the lettuce and the bowl of chopped peanuts. Let everyone make their own wraps. Let the lovely mess begin.

Recipe Notes

I prefer chopped beef or chicken for this recipe.  Yes, you can use ground meat, but if you buy the chicken that way, it tends to be pretty yucky and I prefer the texture of chopped beef to ground. 

I use the food processor and pulse it until it is a fine chop, not as smooth as ground. It gives the dish a nice texture.

There are several of these on the interwebs. I started from Damn Delicious  who modified the recipe at Eat Drink Love and that is as far back as I am going.

Easy Low Carb Egg Nog

OK, let’s start with the disclaimers. This is not that great fluffy egg nog that everyone waxes rhapsodic about, waiting the whole year for a little pinky raised mini cup of ecstasy. This is not alcoholic. This is not aged. This is nothing more than a quick, inexpensive and delicious replacement for the stuff you get in the jugs at the food mart at some exorbitant price at the holidays.

I like egg nog. I’m on a low carb diet. And this stuff is good. And easy. And low carb. So there.

Low Carb Egg Nog

Ingredients

  • 5 Cups milk can be cow, almond or soy
  • 1 Cup cream
  • 1/2 Cup sugar equivalent
  • 8 eggs
  • 1/4 tsp nutmeg optional
  • 1/4 tsp cinnamon optional
  • 1/2 tsp guar gum optional

Instructions

  1. Put all ingredients in a blender. Blend until combined. I try not to get too much air into it, but that's up to you.

  2. For sous vide: Put into quart canning jars...it should take two, but if you frothed it up real good, you might have a bit more.  Put on screw tops and put in sous vide bath for 1 hour at 155.

  3. For stove top: Put in large saucepan and over medium heat and stirring, bring it to approx 165 degrees. Kill the heat. You don't want to boil this or it gets really eggy...not terrible, but

  4. Cool in the refrigerator and then serve.

Recipe Notes

You can add alcohol to this (dark rum, whiskey, bourbon) if you wish.  It's traditional.  I drink it without.

The spices are optional and they do kind of muddy up the liquid, but taste good. An alternative is to leave them out of the mix, but then sprinkle on the surface of your cupful.

Your choice of milk is up to you. They all taste good, but different from each other. Almond and soy milk will have fewer carbs. I like the taste of cow milk. I make and drink them all.

White Cake Frosting

Again, this tastes JUST LIKE what Baker’s Bakery in Parma uses on their Date Nut Cake. It’s not my favorite, but my wife loves it…I love my wife…therefore…

Baker's Bakery (Not!) White Frosting for Date Nut Cake

Ingredients

  • 2/3 Cup butter at room temperature try to get butter that isn't too yellow
  • 5 ounces powdered sugar (it will be about a cup sifted)
  • 1 1/2 teaspoons vanilla extract
  • 1/4 teaspoon salt (if you use salted butter you can skip this)
  • 3-4 Tablespoons warm water

Instructions

  1. Put the butter, sugar, salt and vanilla extract in the mixer bowl of your mixer. I use the whisk attachment on my Kitchenaid because we're going to fluff this up. Turn the mixer on low until everything comes together. Yes, it is thick right now. Turn the mixer to medium and add the water one tablespoon at a time until you have 3 Tablespoons added. Turn the mixer up to high to make the frosting light and fluffy. If it is still too thick, add another Tablespoon of water.

  2. This recipe makes enough to frost one layer. If you double the cake recipe, double this recipe also.

Recipe Notes

If you use "normal" brown vanilla extract, this frosting will not be white, but more of an off-white, or ecru (yes, that's a color). You can get clear vanilla extract, but I don't worry about it. I care what the cake tastes like more than what it looks like. I'm a guy.

Date Nut Cake

In Parma, OH there was a bakery called Baker’s Bakery, and they made a date nut cake that people go ga-ga for. Personally, I like it, but my wife HAS to have it for every birthday. When we lived in Texas, we flew one home on our trip from visiting the Cleveland area. Like I say, ga-ga.

So I figured I’d make a date nut cake. It was GREAT. BETTER than Baker’s Bakery. Or so I thought. Not so da wife. And from some searching online, not so any number of other people who have experienced the cake. And apparently there is not readily available recipe. What to do?

A few years ago was the kicker. My wife’s birthday was on a Monday. She was going to pick herself up a Baker’s Bakery date nut cake. We live about 10 miles from the bakery. No problem. Except it turns out they’re closed on Mondays. Sigh. Got another date nut cake from another bakery. No good (well, it WAS good, but not the same). What to do?

So the next day, we went out to Baker’s Bakery and bought a date nut cake, NOT because we needed the cake, but for research. Dear friends, what appears below is the closest thing to Baker’s Bakery date nut cake you’ll find. The frosting tastes the same. The cake tastes the same. It is, pretty much, the same cake.

The happy, kind of, ending is that Baker’s Bakery closed. No more cake. And I live in Texas again, so even if it WAS open it would be a long commute. I’m glad I worked out the recipe

Baker's Bakery (Not!) Date Nut Cake

Ingredients

  • 3/4 Cup milk
  • 1/2 Cup dates
  • 1/3 Cup shortening
  • 1/3 Cup brown sugar
  • 2/3 Cup white sugar
  • 1 tsp vanilla extract
  • 2 eggs large
  • 1 3/4 Cup all purpose flour
  • 1 tsp baking powder
  • 1/4 tsp baking soda
  • 1/2 Cup walnuts chopped
  • 1/2 tsp salt

Instructions

  1. Preheat your oven to 350. Prepare your pan(s) by rubbing them with shortening, then dusting with flour, or spray with that flour/grease-in-a-can. This recipe makes a single 8X8 inch pan, or you could do two loaf pans and stack them as layers. Or double the recipe and make two full size layers.

  2. Warm the milk and dates in a pan, or microwave until warm. Let sit for at least 10 minutes. Break up the dates into the milk as much as you can. (There are no visible dates in the Baker's Bakery cake. You could use a blender or a food processor. I used a fork to break up the dates).

  3. In a separate bowl, sift together the flour, salt, baking powder and baking soda. Or put the ingredients in the bowl and stir them with your whisk. The idea is to make sure the leavening is evenly distributed.

  4. Cream the shortening in your mixer for a minute or so. Add the sugar and continue creaming for 2 more minutes. Add the vanilla and one egg. Mix until combined. Scrape the bowl. Add the next egg. Mix until completely combined.

  5. Add 1/3 of the flour mixture. Mix on low until combined (15 seconds?). Scrape the bowl. Add 1/2 of the milk/date mixture. Mix on low until combined. Scrape the bowl. Add another third of the flour. Mix on low until combined. Add the last of the milk/date mixture. Mix on low until combined. Add the last of the flour. Mix on low until combined. Pull the bowl from the mixer. Mix in the walnuts, making sure that everything is evenly combined.

  6. Divide into the pans (easy division if you're only doing one pan) and spread the batter smooth. Place in the center of the oven and back for 45-50 minutes for a single layer, 35-40 if you are doing two loaf pans.

  7. Take the cake out of the oven and let sit for 15 minutes, then turn out of the pan onto a cake rack and let cool completely. Frost with White Cake Frosting. To match the Baker's Bakery experience, do two layers with frosting between the layers and sprinkle chopped walnuts on the sides of the cake.
Dressing Supreme

My mother introduced me to this dressing, sort of.  There is a vegetable shop in Harbor City, MI called Bluff Gardens.  Apparently everyone is gaga about their salad dressings. My mother would buy this buy the case and send it as gifts. We got a bottle. Very good. Buy it? Too expensive for my blood.

However, you can often hack the recipe by reading the ingredients, since the order of the ingredients represents the relative amounts of each ingredient…first ingredient is the most, second ingredient is less and so on. The first ingredient in Dressing Supreme is … onions! Whoa, wait. That can’t be right. And yet it is. The first one or two shots at this were a disaster until I figured out that you need to slow cook the onions to make them sweet and not so…oniony. Then it works.

This is some of the best dressing you will ever try and way cheaper than having a case shipped in from Michigan. Probably cheaper than walking down the street to the store if you live there.

Ingredients

  • 1 1/2 Cup onion
  • 2 Cup vegetable oil
  • 1 Cup rice wine vinegar
  • 1 Cup sugar or sweetener if going low carb
  • 1 Tblsp dijon mustard
  • 1 tsp garlic powder
  • 1/2 tsp salt
  • 1/2 tsp celery seed
  • 2 tsp guar gum

Instructions

  1. Chop onion and cook slowly with a bit of water in a frying pan until the onion is clear. The goal is to let the onion get sweet but not to brown it. If it gets slightly tan colored, no problem. If it gets dark brown and black crispy bits you've gone too far. It'll still be edible, just not the same.

    Add all ingredients into a blender. Blend on low until it comes together, then put the spurs to it (higher speed) for about 30 seconds. That'll make sure it is fully blended.

    Store in the refrigerator